After the Occoquan Arts and Craft Fair, I was approached by the Occoquan Business Guild. This holiday season the Virginia Governor’s Mansion is celebrating Virginia’s localities. They invited counties, cities, and towns throughout the state to design an ornament for tree. I was asked to design the Christmas Ornament representing Occoquan!
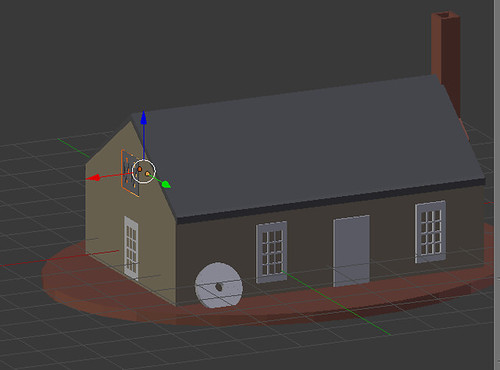
Originally we discussed a replica of the old Ellicott Mill which was the very first automated mill in Virginia. But, the Mill looked to be particularly ambitious in the timeframe (end of October). So we ultimately decided to do an ornament based on the Mill House, which is a structure that still stands today and is home to Occoquan’s Mill House Museum. The Mill House’s shape seemed like it would aesthetically make a better ornament.
This structure also has an emotional connection to me and my family. My maternal grandmother worked at the Mill House Museum for many years.
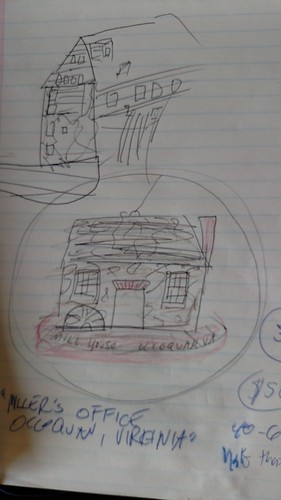
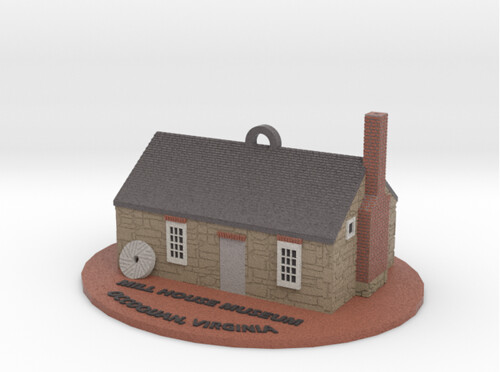
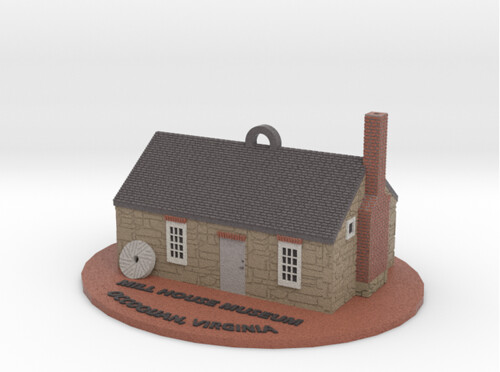
I did some sketches and settled on a pretty literal translation of the Mill House. Since the Mill House is a stone structure, I recommended the final print be in Shapeways’ Full Color Sandstone. I felt its stone-like finish would be perfect for the ornament.
Modeling – Base Structure and Details
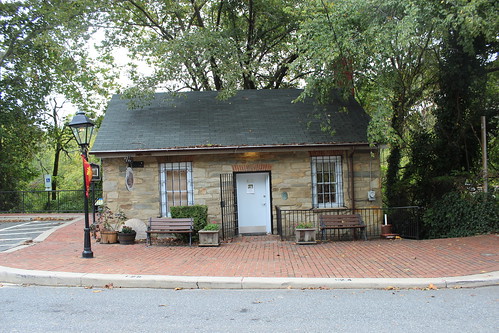
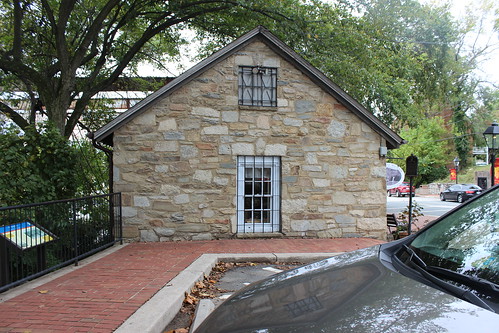
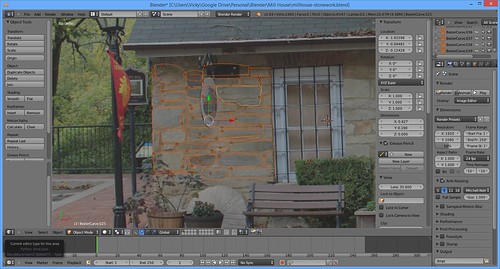
For modeling, I used some reference photos I took of the building.
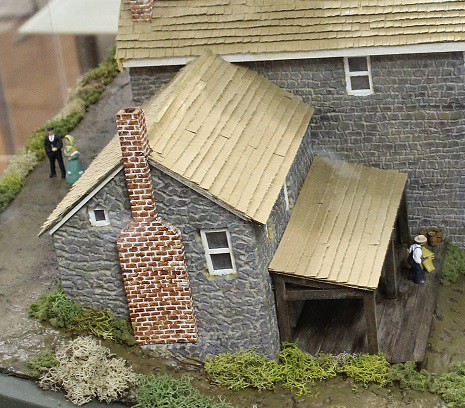
The side of the mill with the chimney was tight for me to get pictures, so for that side I also used a reference photo I took of a model by former Council Member Dr. Walbert.
One of the key features I wanted on the ornament was an old Mill Stone laying on the building. For that, I referred to good ole Wikipedia and its article on millstones!
Modeling – Mill House
I did all my work in the free modeling software Blender. The base model, the windows, the door, the brick trim above the windows and the chimney shape all went quickly and were pretty much done with cubes and basic mesh modeling.
Modeling – Physical Textures
And then I had the tricky part. The stone work and the brick work. Now, because we were planning on Full Color Sandstone, I did have the option of doing a UV Map and doing that details just through the colors. But I decided, I really wanted those textures to be actual textures. If we wanted to print the model in bronzeFill or plastic, I wanted the details to translate. I briefly researched Displacement Maps, but with the time clock ticking, I went with an approach I was more comfortable with. (One day I may look back and think, “Dude- you did this the HARD way!”)
All my physical textures I went with a height of 0.5mm. I have found 0.5mm details look good on my MakerGear M2– it’s big enough for the detail to be distinctive, but small enough that the printer doesn’t struggle with overhangs.
Modeling – Bricks
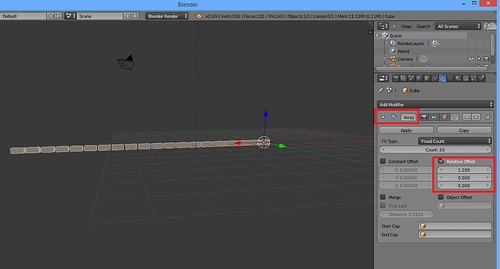
Bricks– I made a small cube as a brick and then used the Array Modifier to make a line of evenly spaced bricks.
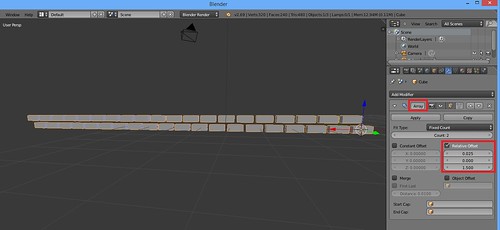
After I applied that Array Modifier, I did another! I made one row and offset it a little bit to get the stratified effect of two rows of bricks.
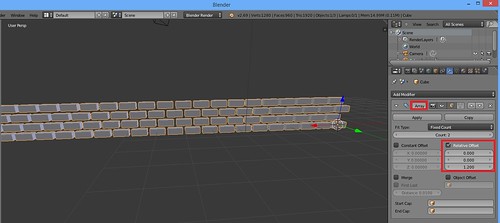
Finally I used the Array Modifier one more time to make a big sheet of bricks!
Modeling – Stones
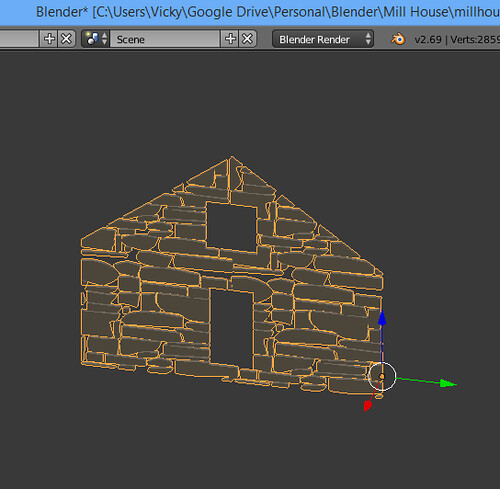
For the stone work, I was partially a purist. I pulled up a new Blender project and traced out some of the real stones of the Mill House in Bezier Curves. And once I had a good selection, I used that mini sheet of stones to make bigger sheets.
Modeling – Fitting the Brick and Stonework
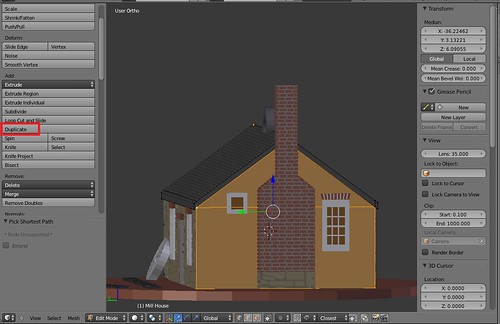
To fit my stonework and brick work to the actual Mill House, I made little templates of the sides I wanted to work with. I started by making a template of the side I wanted the texture for. This would include window and detail cut outs where I did not want stone or brick. This took me a while to find a process I liked. I finally ended up with ended duplicating any pertinent vertices.
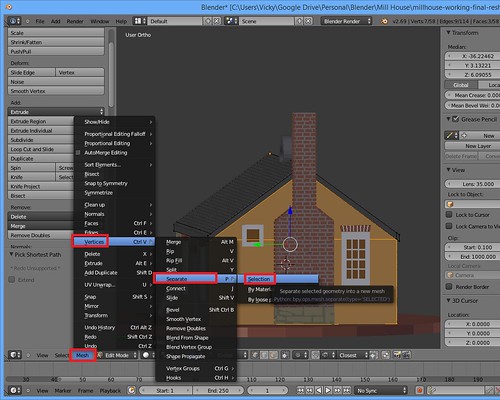
Then I separated them into their own object by going to Mesh->Vertices->Separate->Selection.
I sometimes had to repeat with other objects (such as windows).
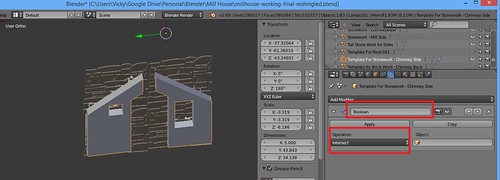
Once I had all the relevant vertices, I made a new face of what I wanted stonework for. From there, I used the Boolean Modifier and Intersection to cut my sheet of stonework into…a specifically shaped sheet of stonework.
And I ended up with my final textured piece that I could overlay over my Mill House.
Modeling – Colors
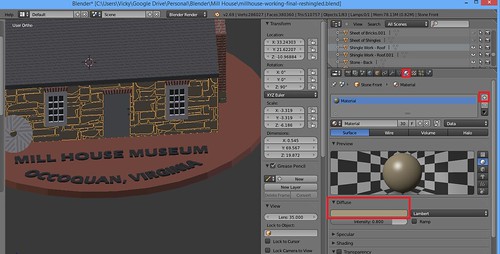
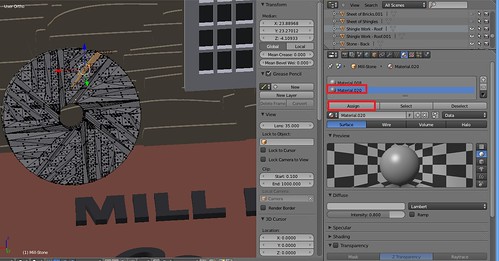
With the Mill House, I didn’t have to create a UV Map for my coloring. I was able to do it all by the Materials tab for my objects.
In a couple of spots, I assigned a different material to specific faces (like grooves in the Mill Stone)
Modeling – Hollowing
To save on material cost I did hollow out my Mill House. It was an easy process– I Inset the bottom face and Extruded up.
Renders and Rework
Originally I did my shingles with an Subdivide, Inset and Extrude technique. It looked fabulous in my Mamie Davis Gazebo Ornament, but I did not like it in my Mill House renders.
I went back and redid the shingles the way I did the bricks (so they were staggered).
I met with my contacts and gave them a tour of the model and the renders and they loved it! The only tweak they had was to add a doorknob.
“That’s it!” I yelled enthusiastically!
The door had been bothering me all week. It just did not look right. As soon as they said doorknob– I knew that was it. That was the missing piece.
Test Prints
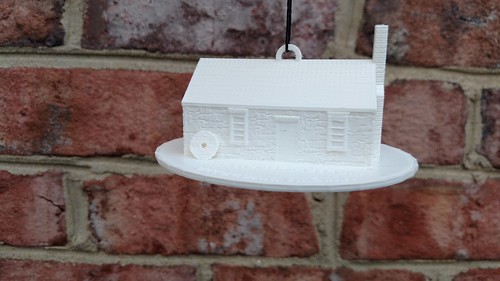
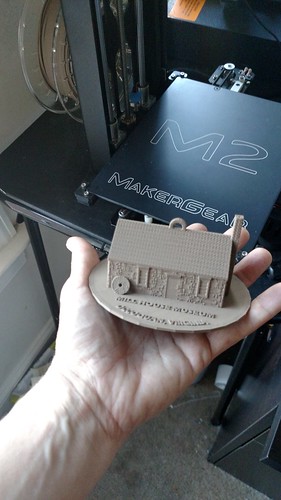
One of my concerns was the balance of the ornament would be off or that once printed, I wouldn’t be fond of the size I chose. So I did a test print on the Maker Gear M2. And….. I was in love. Even though my printer did not pick up the window panes and I noticed a few minor issues, I was impressed at how great all the detailing came out on my printer. I am so glad I went to the trouble to make that stonework and brick work physical details instead of just colors. As for balance– it balanced perfectly!
And for fun, I also did a version for myself in ColorFabb bronzeFill.
Final Print
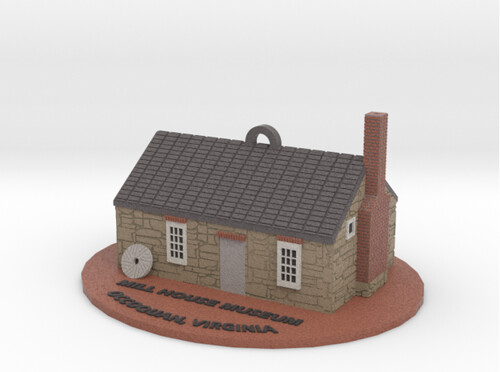
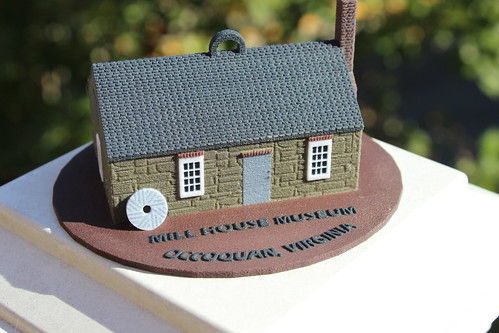
My final print came out a little darker than I expected, but still very identifable as the Mill House. The most important part– the “customer” was thrilled! Phew!
And Now…
And now the ornament makes it way to the Virginia Governor’s Mansion! Exciting!
One thought on “Modeling Diary – Occoquan’s Mill House Museum”